
Platform-specific apps have been in the ecosystem for a long time. But, in recent times, build PWA with AngularJS web apps are grabbing momentum. It is due to the principle of “anyone, anywhere, on any device” with a single code base.
Although you can pick from multiple technologies to build PWA, Angular stands apart from the other ones.
Backed up by the creativity of Google, entrepreneurs are actively trusting the framework. Google continuously announced new innovations in Angular and Angular 15 further enhancing the ease of developing PWs. If you are also planning to get started with Angular 15 and progressive web apps, here is tutorial to Build PWA with AngularJS 15.
Table of Contents
Why opt for Progressive Web Apps?
PWAs deliver a native experience to the users. But the apps are very light in size, load faster, and pack rich features and functionalities. Top angular js development companies have registered stagnant growth in the demand for Angular-based PWAs from entrepreneurs. Why? It is because PWAs are:
- Reliable: Regardless of networking conditions, PWAs are able to launch and give users meaningful content.
- Responsive: PWAs can adapt to multiple screen sizes, making them highly responsible. It also ensures a great user experience.
- Engaging: Native apps were engaging, but with time, web apps have become more engaging. PWAs even get push notifications delivering similar benefits to Native apps. Brands that have built PWAs noted a 134% increase in impressions with 137% higher engagement.
- Secure: Developing, testing, and maintaining the PWAs comes with a high level of security. PWAs follow HTTPS protocols like any other web app.
- Multi-platform: Whether you are using an Android, iOS, Mac, Windows, or Linux, you can deploy PWAs to all of them. That too with stable traffic on all platforms, although the Mobile sessions of PWAs registered an 80% increase.
Top reasons to pick Angular 15 for PWA development
The advancement in the angular framework is why enterprises and startups choose angular for building PWA.
Flawless JavaScript support
The framework work is enabled by JavaScript’s fascinating robust web app development. And JavaScript is well known for responsiveness. You can embed the rich library of JavaScript components into your PWA, making it an exceptional app.
CLI integration makes learning easy
Before CLI, it was tough to learn the Angular framework. However, Google considered this challenge and rolled out CLI to provide an easy development environment. CLI is a command line interface to build progressive web apps especially.
Dependency injection
Angular eliminates the dependency of objects, becoming a unique feature for PWA development. However, there are times when objects require another module, yet the objects remain independent. Additionally, the code is maintainable and readable while build the PWA with AngularJS.
Architecture advantage
Angular does not use a Model view controller, instead, it uses a component-based architecture for development. This is why it is possible to split angular apps into independent functional components.
Support from Google
If you look at the documentation of Angular, you will find out how much focus Google has put on it. The documentation is comprehensive enabling developers to discover necessary information. Further, the credibility of Google in rolling out new updates has been stable since Angular was launched. Additionally, the community of developers stays active in case developers need help.
Setting up the environment to build PWA with AngularJS
Before getting started with the development part, it is crucial for you to set up the prerequisites required to build PWA with Angular.
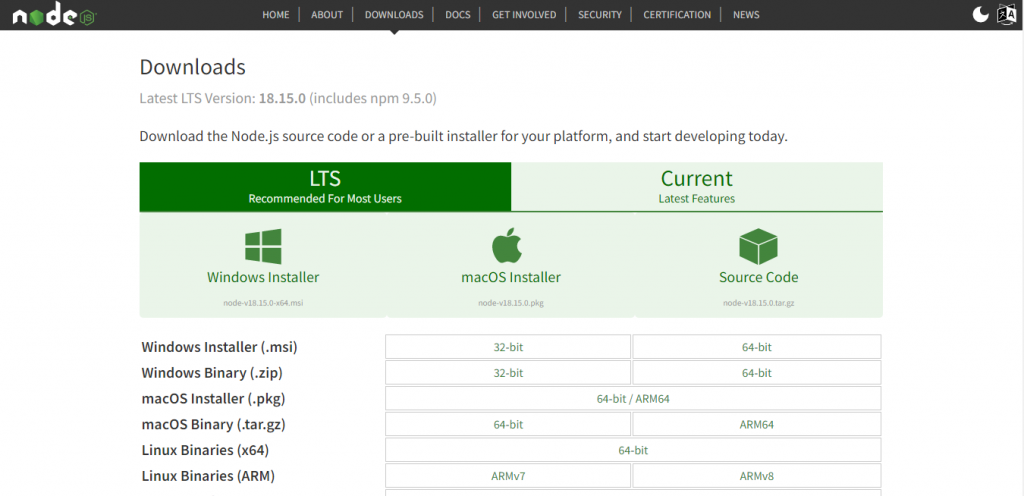
Installing Node.js and NPM
The very first step is you need Node.js and NPM on your system. We are using Windows as our primary device. The steps for MAC and Linux might be different.
Step 1
Head to https://nodejs.org/en/download URL and click on Windows installer. Mac and Linux users have to click from the other two.
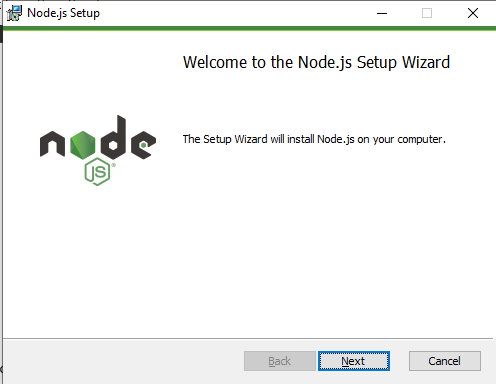
Step 2
Install Node.js on your system.
Step 3
Open Command Prompt and type node -v to verify if your Node Js’ latest version is installed. Also, type the command npm -v to verify the Node package manager. The screen should look like this:
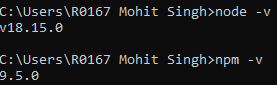
Note: In case you see some other message instead of a version of Node.js, you have to specify the Node.js path to the environment variable.
Install the Angular CLI on your system
Once you have installed Node.js and NPM on your system, you also have to install Angular CLI. Here are the steps to do so.
Step 1
Open the terminal window and type “npm install -g @angular/cli” and the installation will start.

Note: In case your NPM is an older version. You can use “Run npm install -g [email protected] to update!” to update your NPM to the latest version.
Install Visual Studio on your system
Visual Studio will be our default IDE to build PWA using AngularJS 15. Head to https://visualstudio.microsoft.com/downloads/ and download it.
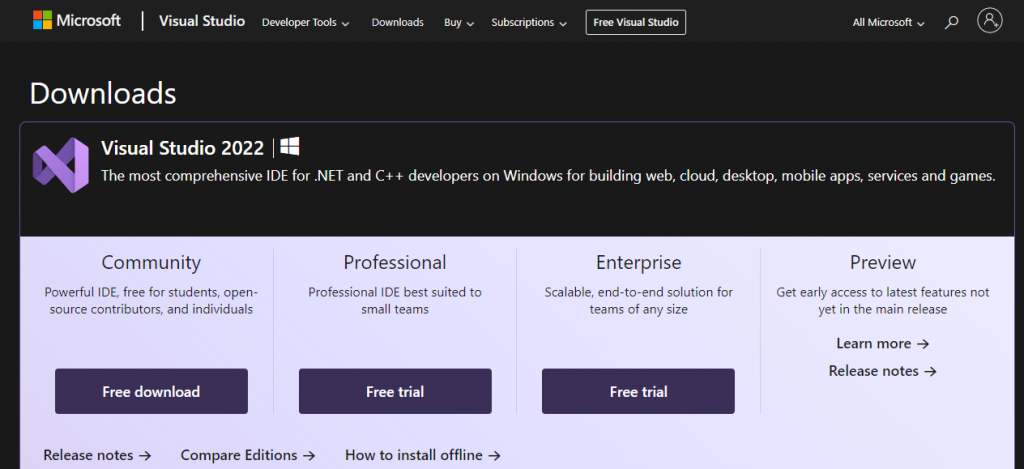
Mac and Linux users can download Visual Studio according to their operating system.
Install Angular CLI
Run the command npm install -g @npmcli/fs in your terminal and wait for the installation to complete automatically.

Note: Earlier, we used to type the command npm install -g @angular/cli but the command has been moved to npm install -g @npmcli/fs. This is why we are using the latest command to install Angular CLI.
Install GIT to your system
Here are the steps to install GIT on your system. We are using Windows as your default OS. If you are using Linux or Windows, you have to download specific versions.
Step 1
Head to https://gitforwindows.org/ and click on download GIT.
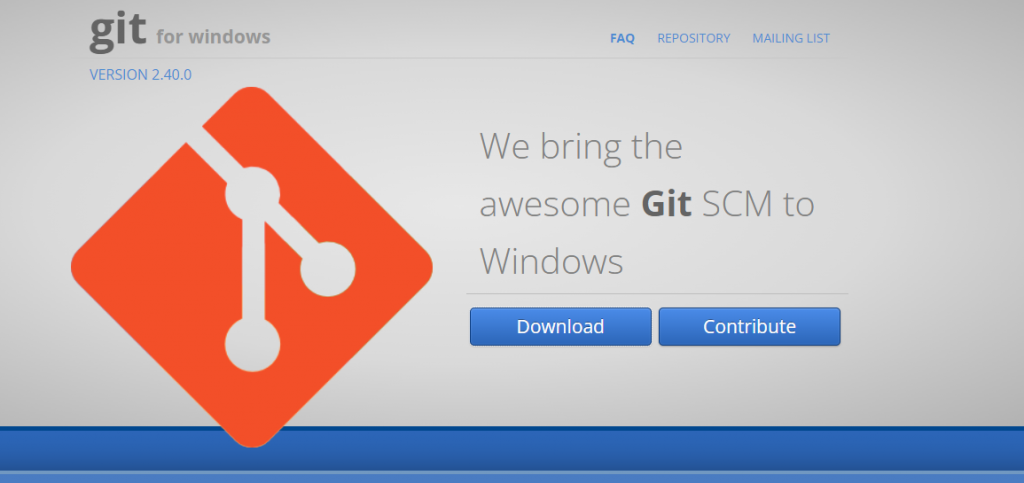
Step 2
Install the software by clicking next multiple times.

Building PWA with AngularJS
Now we are ready to build PWA with AngularJS 15. Follow the steps below to get started.
Step 1
Use the command ng new angular-pwa to create the app. The system will ask you for the default style sheet, and there you can specify CSS and press enter.
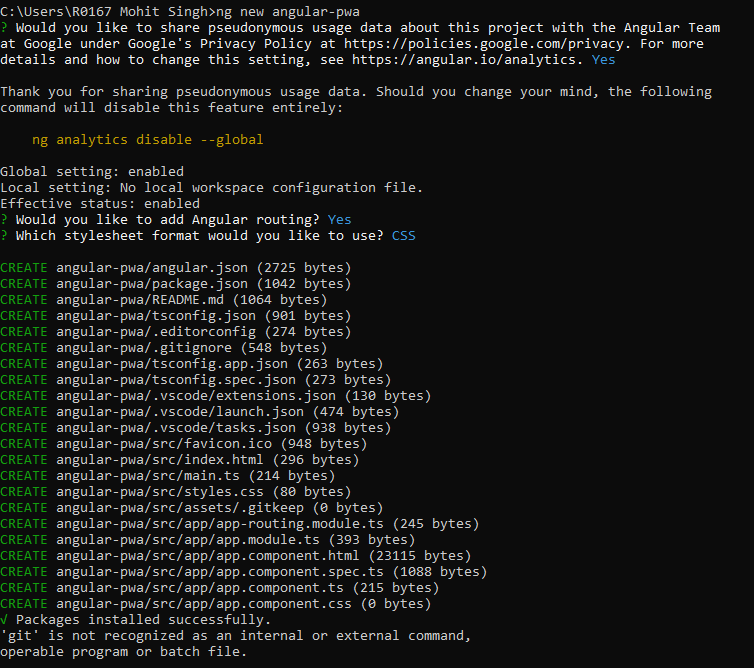
Step 2
Change the command line directory to your PWA by using cd command.

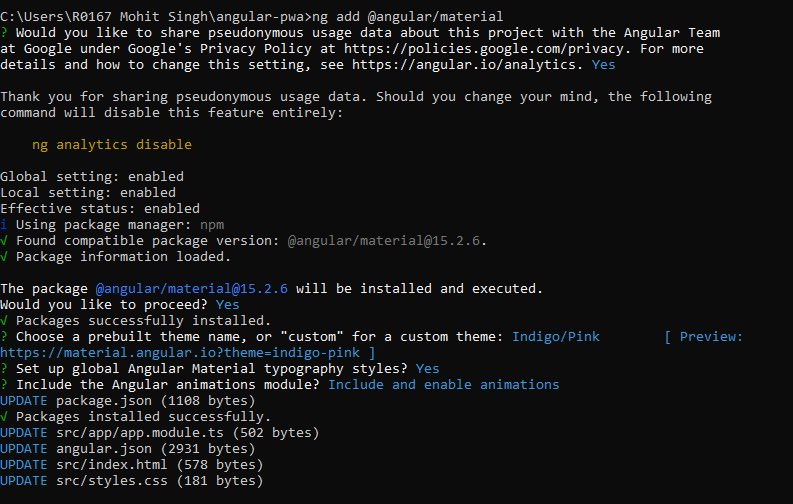
Step 3
Add Angular Material Design UI Library to your app by using ng add @angular/material
Step 4
Add material theme in the file style.css found in the src folder of your app. When you open the file, add this code: @import “~@angular/material/prebuilt-themes/indigo-pink.css”;
Step 5
Build & Consume rest API using HttpClient by adding HttpClientModule under the imports to the app.module.ts file.
Step 4
Generating a service rest to the app.

Step 5
Open the rest-api.services.ts file in the app folder of your application and replace the code with the following:
import { Injectable } from '@angular/core';

import { Observable } from 'rxjs';

import { HttpClient } from '@angular/common/http';

export interface User {

  id: string;

  name: string;

  email: string;

  website: string;

}

@Injectable({

  providedIn: 'root'

})

export class RestApiService {

  api: string = "https://jsonplaceholder.typicode.com/users";

  constructor(private http: HttpClient) { }

  getUsers(): Observable<User[]> {

    return this.http.get<User[]>(this.api)

  }

}
Step 6
Now add the following code in the app.component file in the src/app/ folder of your Angular app.
import { Component, ViewChild } from '@angular/core';

import { RestApiService } from './rest-api.service';

import { MatPaginator } from '@angular/material/paginator';

import { MatTableDataSource } from '@angular/material/table';

export interface TableElement {

  id: string;

  name: string;

  email: string;

  website: string;

}

@Component({

  selector: 'app-root',

  templateUrl: './app.component.html',

  styleUrls: ['./app.component.scss'],

})

export class AppComponent {

  Data!: TableElement[];

  col: string[] = ['id', 'name', 'email', 'website'];

  dataSource = new MatTableDataSource<TableElement>(this.Data);

  @ViewChild(MatPaginator, { static: true }) paginator!: MatPaginator;

  constructor(private restApiService: RestApiService) {

    this.restApiService.getUsers().subscribe((res) => {

      this.dataSource = new MatTableDataSource<TableElement>(res);

      setTimeout(() => {

        this.dataSource.paginator = this.paginator;

      }, 0);

    });

  }

}
Step 7
It’s time to add the layout to the html file of Angular app. Add the following code to the app.component.html file.
<mat-toolbar colour="accent" class="header">
<span>Angular PWA Example</span>
</mat-toolbar>
<table mat-table [dataSource]="dataSource" matSort>
<ng-container matColumnDef="id">
<th mat-header-cell *matHeaderCellDef mat-sort-header> ID. </th>
<td mat-cell *matCellDef="let element"> {{element.id}} </td>
</ng-container>
<ng-container matColumnDef="name">
<th mat-header-cell *matHeaderCellDef mat-sort-header> Name </th>
<td mat-cell *matCellDef="let element"> {{element.name}} </td>
</ng-container>
<ng-container matColumnDef="email">
<th mat-header-cell *matHeaderCellDef mat-sort-header> Email </th>
<td mat-cell *matCellDef="let element"> {{element.email}} </td>
</ng-container>
<ng-container matColumnDef="website">
<th mat-header-cell *matHeaderCellDef mat-sort-header> Website </th>
<td mat-cell *matCellDef="let element"> {{element.website}} </td>
</ng-container>
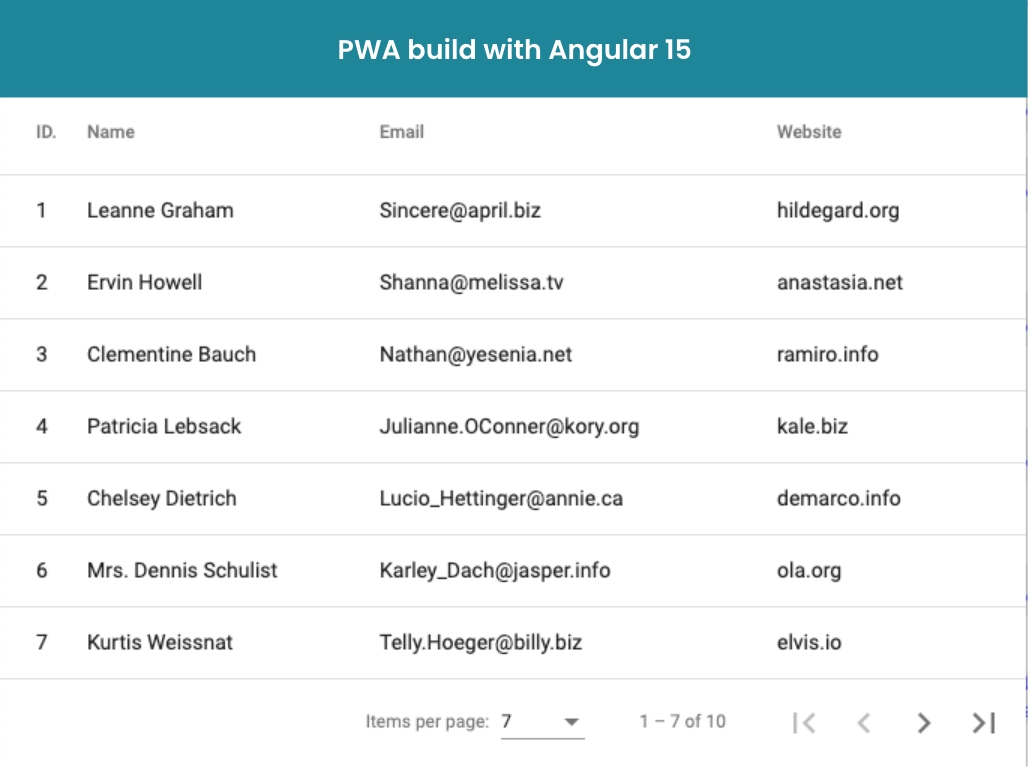
<tr mat-header-row *matHeaderRowDef="col"></tr>
<tr mat-row *matRowDef="let row; columns: col;"></tr>
</table>
<mat-paginator [pageSizeOptions]="[7, 14, 28]" showFirstLastButtons></mat-paginator>
Step 8
Now that we have created our angular app, it is time to convert the app to progressive web app (PWA). Use the command, ng add angular pwa. Also use the below commands:
- npm i @angular/service-worker –force to add angular service-worker module
- npm install -g http-server to configure production build with http server
- ng build –prod to build app for production
- http-server -o to start the build
Step 9
Here is our app.
Conclusion
Build PWA with AngularJS wins a pool of advantages. PWAs are the future, and entrepreneurs shall opt for PWA with Angular in order to achieve the reliability and security they want in their apps. However, if you want to build heavy applications like gaming apps, PWAs won’t be a good fit. Whereas for all their industries, PWAs using Angular can be a sustainable and promising development approach.

SHARE
WRITTEN BY
Ishan Gupta
CEO & Founder
Ishan Gupta is a seasoned entrepreneur and CEO with extensive 8+ years of experience in business and mobile app development landscape. He believes that the right digital product allows companies to focus on what they do best, while technology handles the rest. With deep exposure to global markets, he understands what makes an app succeed. His approach translates business needs into clear product strategies, ensuring that every feature contributes to measurable ROI.
View All Articles


 India
India USA
USA Australia
 Canada
 UK
UK UAE
UAE