Here’s a number that should stop you cold: 95% of new products fail after launch. Not because the technology was broken. Not because the market didn’t exist. They failed because the teams building them skipped one critical step: validating the idea before scaling it.
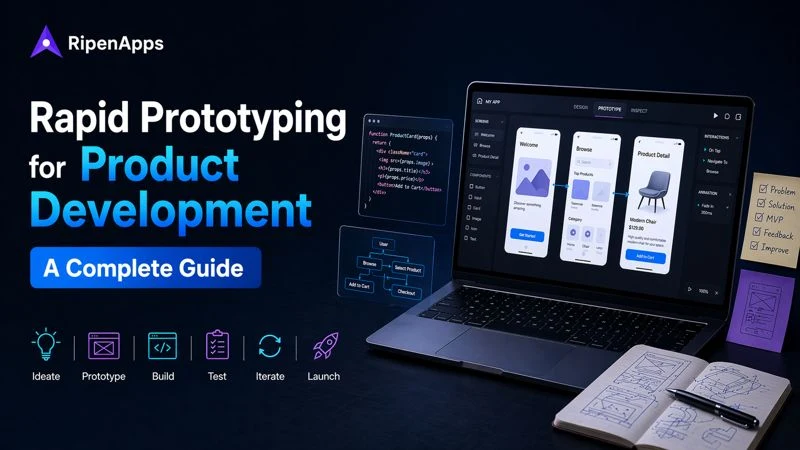
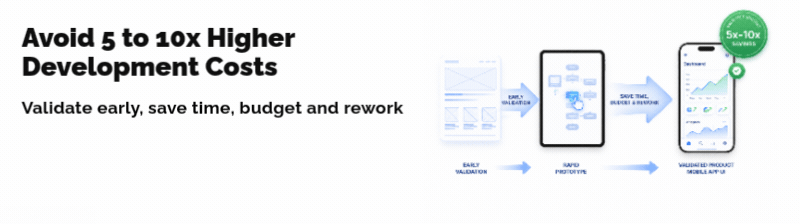
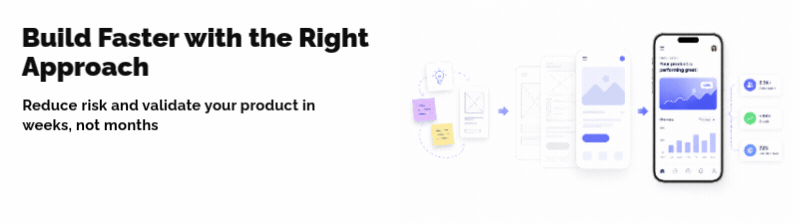
If you’re a founder, product manager, or enterprise decision-maker planning a digital product launch in 2026, you cannot afford to spend 6 to 12 months and six figures building something your users won’t want. That’s precisely why rapid prototyping for product development has become the single most important practice separating companies that ship successful products from those that burn budgets chasing the wrong vision.
At RipenApps, we’ve helped over 250+ startups and enterprises across HealthTech, FinTech, EdTech, and Logistics validate, prototype, and build products that users actually love and investors actually fund. If you’re looking for rapid prototyping services, you’re in the right place.
This guide will walk you through everything: what rapid prototyping methodology really means in 2026, which methods and tools are right for your product stage, and how to evaluate approaches. We will also help you in making the final decision that gets your product to market faster, smarter, and with far less risk. So, let’s get into it:
Key Takeaways
- Rapid prototyping helps teams validate product ideas early, reducing development risk, rework costs, and time-to-market significantly.
- Choosing the right prototype type, from wireframes to high-fidelity, depends on product stage, goals, and validation needs.
- User testing during prototyping uncovers usability issues early, ensuring better product-market fit and improved user experience outcomes.
- Skipping prototyping often leads to expensive rework, delayed launches, and products that fail due to poor user validation.
- Partnering with experienced prototyping companies enables faster validation, strategic insights, and scalable product development with lower risk.
Table of Contents
The Problem Rapid Prototyping Solves
In traditional product development, teams typically:
- Spend months gathering requirements
- Build a complete product
- Launch it
- Discover users don’t want it or want something entirely different
This “build-then-learn” model is catastrophically expensive. This is one of the most common reasons startups fail, especially when they rely on invalidated assumptions instead of structured startup product development services.
A software bug caught during the design phase costs roughly 10x less to fix than one caught during development, and 100x less than one caught post-launch (IBM Systems Science Institute). Rapid prototyping process flips the model: learn first, then build.
Why Rapid Prototyping Methodology is Non-Negotiable in 2026
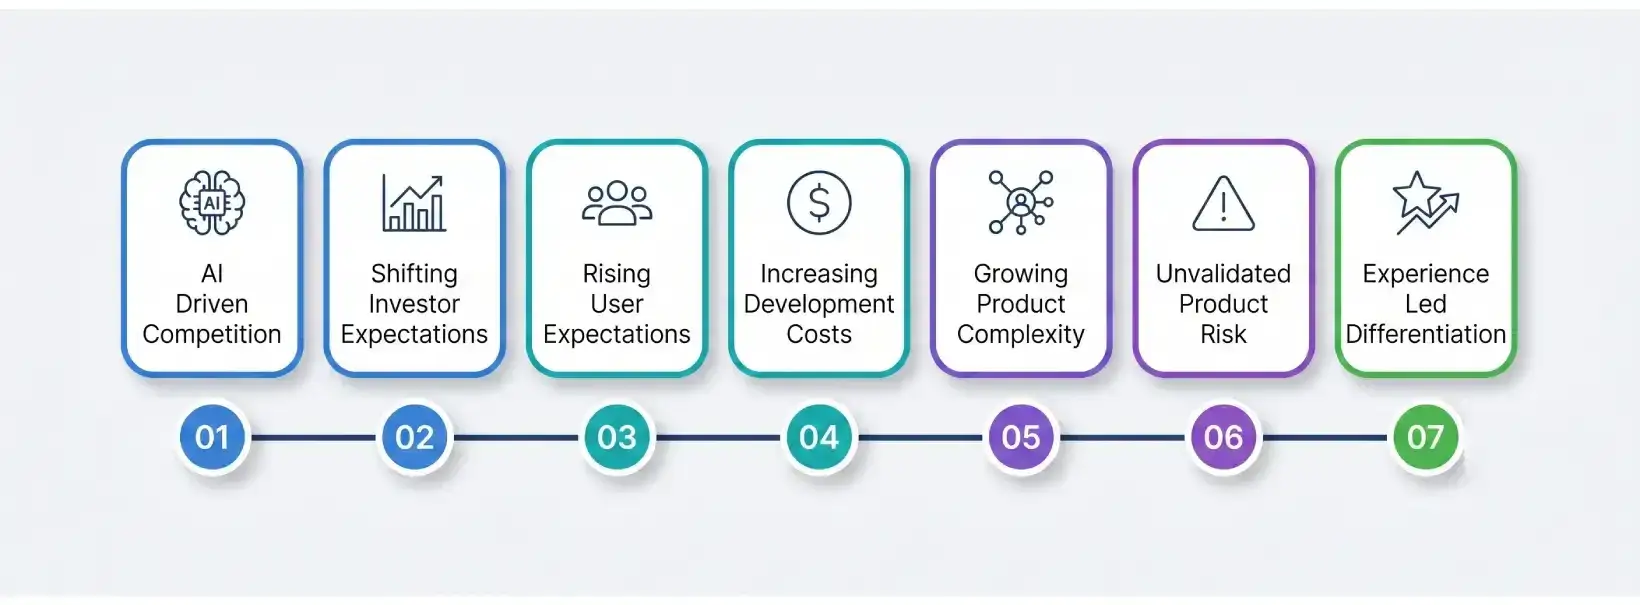
The product development landscape has changed dramatically. But most teams are still operating with outdated assumptions. Here’s what’s driving the urgency:
1. AI-accelerated competition
In 2026, competitors can spin up functional MVPs faster than ever using AI-assisted coding tools. If you’re spending 8 months building version 1 while your competitor validates and ships in 6 weeks, you’ve already lost market position.
AI has made building products faster. It has not made building the right products easier. In fact, it has made it easier to build the wrong product faster. That’s exactly why validation is no longer optional. It’s a competitive advantage.
2. Investor expectations have shifted
Pre-seed and seed investors today increasingly expect to see a validated prototype or functional MVP before committing. According to CB Insights, 42% of startups fail because there’s no market need that rapid prototyping techniques directly address.
Investors are no longer funding ideas. They’re funding a validated direction.
3. User expectations are at an all-time high
In 2026, users have zero patience for clunky, confusing products. First-session retention is more critical than ever. Products need to get UX right from day one, and that’s only possible with rigorous pre-development testing.
Users don’t give second chances to confusing products. If the first experience fails, the product fails.
4. Development costs are rising
Despite AI tooling reducing some overhead, senior engineering talent remains expensive. Every hour of engineering spent rebuilding a feature that wasn’t validated first is pure waste. Rapid prototyping tools protect your development budget like nothing else.
AI reduces build time. It does not reduce the cost of building the wrong thing.
5. Increased product complexity
Modern products are no longer simple. They involve integrations, real-time data, AI capabilities, and multi-platform experiences. This is especially true as businesses increasingly rely on software modernization services to upgrade legacy systems and stay competitive.
Without early validation, this complexity can lead to major technical and usability challenges later. Prototyping helps de-risk these complexities before full-scale development.
Complexity doesn’t break products. Invalidated complexity does.
6. Higher risk of building the wrong product
The biggest risk is not failure. It’s confidently building something nobody needs.
Without prototyping, teams rely on assumptions instead of real user feedback. Rapid prototyping processes ensure that decisions are based on validated insights, not guesswork.
7. Competitive differentiation through experience
In crowded markets, features alone are no longer enough. User experience has become a key differentiator. Companies that invest in rapid prototype development are able to refine flows, interactions, and usability early, creating products that stand out and retain users.
Features can be copied. Validated user experience cannot.
What is Rapid Prototyping?
Rapid prototyping is an iterative product development approach where a simplified, early version of your product or a specific feature set is built quickly, tested with real users, and refined based on feedback before full-scale development begins.
Think of it as the “measure twice, cut once” principle for digital products. Instead of committing your full engineering budget to a complete build, you create testable representations at different fidelity levels to validate assumptions early.
The word “rapid” is intentional. Traditional prototyping could take months. Modern rapid prototyping methodology, powered by today’s tools, AI-assisted design, and agile workflows, can produce testable prototypes in days to weeks, not quarters. This is why many businesses choose to work with an experienced product development company to ensure their ideas are validated before full-scale development.
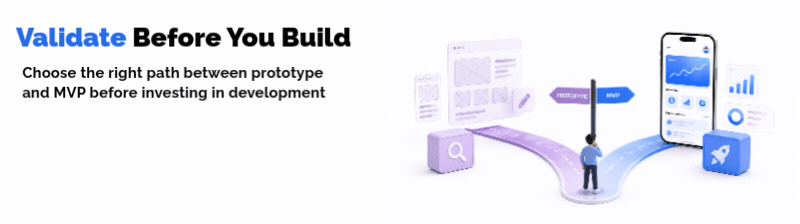
Prototype vs MVP: What Should You Build First?
Now that you understand the different types of prototypes, the next critical decision is choosing whether to start with a prototype or an MVP. Instead of guessing, here’s a simple framework to help you decide:
1. Based on Your Goal
- Validate idea or test concept: Build Prototype
- Launch product to real users: Go with MVP
2. Based on the Budget
- Limited budget: Prototype (low investment, low risk)
- Higher budget: MVP (requires development and infrastructure)
3. Based on Timeline
- Need quick validation (2–3 weeks): Prototype
- Ready for market launch (6–10 weeks): MVP
4. Based on Risk Level
- High uncertainty about the idea: Prototype first
- Validated idea with clarity: Move to MVP
5. Based on Product Stage
- Early-stage or idea phase: Prototype
- Post-validation or ready to scale: MVP
Most successful products do not start with MVP; they start with rapid prototyping. By validating ideas early, you reduce development risk, save costs, and ensure that your MVP is built on real user insights rather than assumptions.
If you’re still validating your idea, starting with an MVP is a costly mistake.
In most early-stage scenarios, a prototype is the faster, safer, and more cost-effective choice. MVPs should only come after your core assumptions are validated with real users.
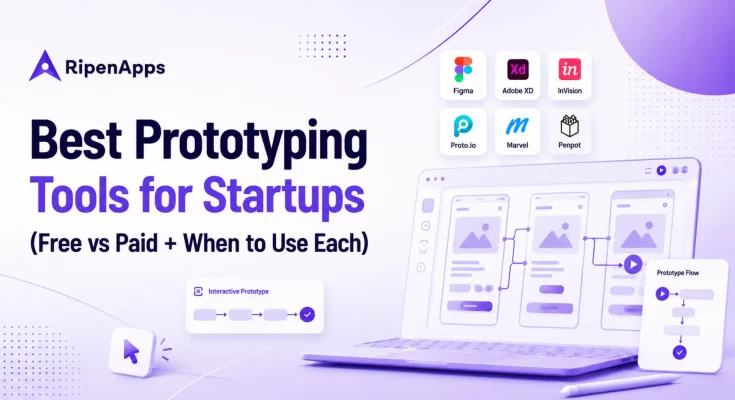
Types of Prototypes: From Sketch to Near-Real
Most teams choose prototype types based on what’s easy to create. The right choice depends on what you’re trying to de-risk.
If you’re choosing prototype fidelity based on comfort instead of uncertainty, you’re already making a costly mistake.
Most teams don’t need more prototype types. They need better decision clarity.
The real question is not “what should we build?” It’s “what risk are we trying to eliminate right now?”
1. Wireframes
Wireframes are digital blueprints that define layout, structure, and navigation without focusing on visual mobile app design. They help teams focus on functionality and user flow.
When to use:
- Structuring product features and flows
- Aligning stakeholders on layout and navigation
- Early-stage UX validation
When NOT to use:
- Presenting to investors or clients, expecting polished visuals
- Testing emotional or visual engagement
Example:
A SaaS company is mapping out dashboard layouts in Figma to finalize how users navigate between features before adding design elements.
2. Clickable Prototypes (Mid-Fidelity)
Clickable prototypes simulate real user interactions by linking screens together. They allow users to experience the product flow without actual development.
When to use:
- Usability testing with real users
- Validating core user journeys
- Demonstrating product flow to stakeholders
When NOT to use:
- Testing technical performance or backend logic
- Validating complex integrations
Example:
A fintech startup is creating a clickable loan application flow to test where users drop off before building the actual product.
3. High-Fidelity Prototypes
High-fidelity rapid prototypes are near-real representations of the final product, including design, branding, animations, and micro-interactions.
When to use:
- Investor presentations and demos
- Final usability testing
- Stakeholder approvals before development
When NOT to use:
- Early-stage ideation (too time-consuming)
- Situations where core assumptions are still unclear
Example:
A HealthTech company presenting a fully designed app prototype to investors to showcase user experience and product vision.
Prototyping Methods: Head-to-Head Comparison
This is where most teams make the wrong call. They optimize for speed or cost instead of validation depth.
| Method | Speed | Cost | Validation Depth | Best Stage |
| Paper Sketching | Hours | Near-zero | Low | Ideation |
| Wireframing | 1–3 days | Low | Medium | Early UX |
| Clickable Prototype | 1–2 weeks | Medium | High | Pre-dev validation |
| High-Fidelity Prototype | 2–4 weeks | Medium-High | Very High | Final validation/investor demo |
| Code Prototype / PoC | 2–6 weeks | High | Technical | Complex feature testing |
| MVP Build | 6–16 weeks | High | Market | Go-to-market |
The method itself is not the decision. Whether it reduces uncertainty before development is.
Read More: MVP Development Cost: Key Factors, Estimations, and Optimization Strategies
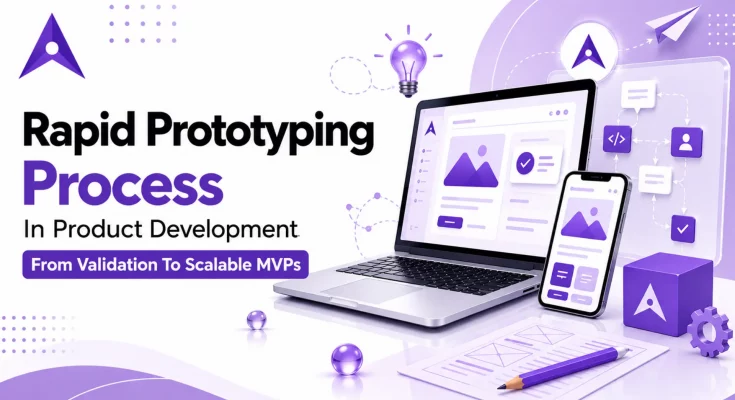
The Rapid Prototyping Process: A Practical Framework

While methodologies may vary, the most effective rapid prototyping process in 2026 follows a structured, iterative loop designed to reduce risk, validate ideas faster, and accelerate time-to-market.
Most teams don’t fail because they lack process. They fail because they follow the wrong sequence.
Step 1: Define the Problem (Not the Solution)
Everything starts with clarity. Instead of jumping into features or UI ideas, focus on the core user problem. If you’re jumping to UI before this step, you’re already making a mistake.
- What specific pain point are you solving?
- Who is experiencing it?
- Why does it matter now?
Use frameworks like Jobs-to-be-Done (JTBD), user interviews, surveys, and competitor analysis to uncover real user motivations. If you’re not doing this, you’re building on assumptions. Skipping this step is exactly why most products fail.
The goal is to validate the problem before investing in the solution. Teams that skip this step often build products users don’t need.
Step 2: Map User Journeys
Before designing screens, map the end-to-end user journey. This ensures your product aligns with real user behavior. Most products don’t fail at the UI level. They fail at the flow level.
At this stage, leveraging top-notch UI/UX design services ensures that user flows are intuitive and aligned with real user behavior.
- Identify entry points (how users discover the product)
- Map actions (what they do step-by-step)
- Highlight friction points and decision moments
If the journey is broken, no amount of UI polish will fix it. This step creates a clear flow from problem awareness to goal completion, helping teams avoid disjointed experiences later.
Step 3: Build the First Prototype (Low-Fidelity)
Now translate your ideas into a low-fidelity prototype. Speed matters here, but direction matters more.
- Use sketches, wireframes, or basic clickable flows
- Focus only on core functionality, not design polish
- Keep it fast: hours, not days
If you over-invest at this stage, you’re increasing the cost of being wrong. The goal is simple: test assumptions quickly without over-investing.
Step 4: Test With Real Users
Validation begins here. Put your prototype in front of 5–8 target users.
This is where most internal assumptions break. That’s exactly the point.
- Observe how they interact (don’t guide them)
- Note confusion, hesitation, and drop-offs
- Ask open-ended questions after the session
The key rule: Don’t explain your product, let users reveal its flaws. If you have to explain it, the product isn’t clear enough.
Step 5: Analyze and Iterate
Testing is useless without iteration. Most teams collect feedback. Very few act on it correctly.
- Identify recurring patterns in feedback
- Priorities issues based on impact
- Refine flows and interactions
If your iteration is based on opinions instead of patterns, you’re still guessing.
Repeat this loop 3–5 times until your core usability and value proposition are validated. This is where rapid prototyping development delivers its biggest advantage: learning fast without heavy development costs.
Step 6: Escalate Fidelity
Once the core experience works, move to high-fidelity prototypes. If you haven’t validated the basics, this step becomes expensive decoration.
- Add visual design (colors, typography, branding)
- Introduce micro-interactions and animations
- Test edge cases and advanced scenarios
At this stage, your prototype should closely resemble the final product, enabling stakeholder alignment and deeper validation.
Step 7: Handoff to Development
With validated designs, the transition to development becomes seamless.
At this point, you’re no longer guessing. You’re executing. With validated designs in place, teams can move forward confidently by leveraging reliable mobile app development services for seamless execution.
- Provide annotated designs and interaction specs
- Define user flows and edge cases clearly
- Align designers and developers early
This eliminates guesswork and reduces rework, enabling faster and more efficient development. Leveraging expert full stack development services at this stage ensures your validated ideas are translated into scalable, high-performance products.
Which Rapid Prototyping Approach Is Right for Your Product?
This is where most product teams make the most consequential mistakes. They pick a prototyping approach based on what’s familiar or what a vendor recommends, not based on what’s actually aligned to their product stage, team capability, and business objective.
Let’s break this down properly.
Approach 1: In-House Prototyping
Who it’s for: Companies with existing UX design teams and product managers who have bandwidth.
Pros:
- Deep context on business goals
- Faster feedback cycles within the organization
- No vendor onboarding overhead
Cons:
- Internal bias, your team is often too close to the product to see usability failures objectively
- Limited if your team lacks specialized UX research skills
- Often slower due to competing priorities
- Risk of “design by committee” that waters down decisions
Best for: Large enterprises with dedicated product design teams running secondary feature validation, not primary product development.
Not ideal for: Startups, scale-ups, or any team building their core product from scratch.
Approach 2: Freelance Designer/Prototyper
Who it’s for: Bootstrapped founders or very early-stage startups with minimal budget.
Pros:
- Lower cost per deliverable
- Quick to engage
Cons:
- No strategic product thinking you get screens, not solutions
- No user research capability (typically)
- High coordination overhead
- Risky for complex products requiring systems thinking
Best for: Simple landing page prototypes or basic wireframe validation.
Not ideal for: Anything requiring UX strategy, multi-platform thinking, or technical feasibility testing.
Approach 3: Full-Service Product Development Partner
Who it’s for: Startups, scale-ups, and enterprises that want to go from idea to validated product with one accountable partner.
Pros:
- End-to-end capability: UX research, prototyping, and product development life cycle
- Strategic product thinking, not just execution
- User research-informed design (not assumptions)
- Technical alignment from day one
- Faster time-to-market through integrated workflows
Cons:
- Higher upfront investment than freelance
- Requires clear communication of product vision
Best for: Any team serious about building a product that works, not just a product that ships.
This is the model RipenApps operates on: we don’t just make prototypes. We build validated product blueprints that your engineering team or ours can execute with confidence.
Key Decision Factors: How to Choose Your Path
Before selecting a method or partner, you need clarity on a few critical factors. Most teams don’t fail because they chose the wrong tools.
They fail because they asked the wrong questions at the start.
Each one directly impacts how fast, efficiently, and successfully your product moves forward.
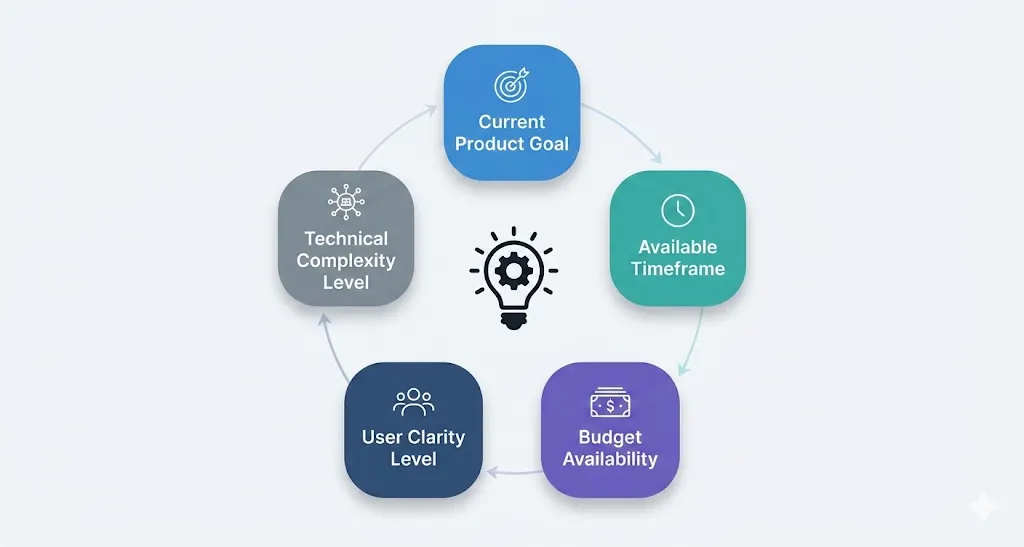
1. What is your primary goal right now?
If your goal isn’t clear, your prototype won’t fix it. If you’re validating an idea, a clickable prototype is enough to test user understanding. If your goal is to secure funding, you’ll need a high-fidelity prototype that clearly communicates your product vision. For technically complex products, a code prototype helps validate feasibility, while launching to early users requires an MVP that delivers real value.
2. What is your timeline?
Your timeline determines how deep you can go in the process. If you’re working within 30 days, focus on quick validation using wireframes or clickable prototypes. With 30–90 days, you have room for high-fidelity prototypes or technical testing. Longer timelines allow for full MVP development, but only after initial validation is complete.
3. What is your budget reality?
Your budget should guide your level of investment, not limit your thinking. Smaller budgets are best used for early-stage validation through wireframes or basic prototypes. Mid-range budgets allow for detailed prototypes with some user research. Higher budgets enable a complete prototyping sprint that transitions smoothly into development, reducing long-term risk.
4. How well-defined is your user?
The clarity of your target user determines where you start. If your understanding is based on assumptions, you need to begin with user research to avoid building the wrong product. If you already have strong user data, you can move directly into prototyping and validation, saving time and accelerating execution.
5. How complex is the technical architecture?
Technical complexity plays a major role in deciding your approach. Simple applications with standard workflows can be validated through UI and UX design prototypes alone.
However, products involving real-time data, AI, or complex integrations require a code-level prototype to test performance and feasibility early. Ignoring this can lead to major development challenges later.
Read More: AI in MVP Development: A New Era of Faster and Smarter Product Validation
Should You Build In-House or Hire a Prototyping Company?
Once you understand the available approaches, the next step is deciding whether to build internally or work with an external prototyping partner.
- Speed: In-house teams often move more slowly due to internal priorities, while prototyping companies deliver faster with focused workflows.
- Cost: In-house may seem cheaper initially, but delays and rework can increase overall costs. External teams offer more predictable outcomes.
- Expertise: Internal teams may lack specialized UX and research capabilities, whereas prototyping companies bring proven processes and cross-industry experience.
- Risk: In-house teams can carry bias, while external partners rely on user validation, reducing the risk of building the wrong product.
What this means in practice:
In-house prototyping works when you already have clarity, resources, and time.
But when you’re still validating your idea or working against tight timelines, relying only on internal teams can slow down decision-making and increase risk.
For startups and businesses building core products, working with a rapid prototyping company is often the faster, more efficient, and lower-risk approach.
When Should You Hire a Rapid Prototyping Company?
Choosing the right approach is important, but the bigger question is when it makes sense to bring in an external prototyping partner. Here are the key situations where hiring a rapid prototyping company is the right decision:
When You Don’t Have an In-House UX or Product Team
- Without dedicated UX or product expertise, teams often rely on assumptions instead of real user insights.
- This can lead to poor product decisions and usability issues.
- A prototyping company brings structured processes and validated approaches to guide development.
When Speed is Critical
- If you need to validate your idea quickly, internal teams may face delays due to bandwidth and priorities.
- External teams work with focused workflows, helping you move from idea to validation much faster.
When You Need an Investor-Ready Prototype
- Investors expect a clear and tangible product vision, not just an idea.
- A well-designed prototype helps communicate value, user flow, and product potential effectively.
When Your Product is Complex
- Products with multiple features, integrations, or advanced logic require deeper validation.
- Prototyping helps identify usability and technical challenges early before development begins.
When You Want to Reduce Risk and Cost
- Building without validation often leads to rework and wasted development effort.
- Prototyping helps catch issues early, saving both time and cost in the long run.
If even one of these scenarios applies to you, continuing without structured prototyping is a risk. Working with a rapid prototyping company is not just about speed; it’s about reducing uncertainty, avoiding costly mistakes, and building the right product from the start.
The Rapid Prototyping Cost Reality in 2026
The cost of hiring a rapid prototyping company depends on the scope, complexity, and level of validation required. However, compared to the cost of rebuilding a product after launch, this investment significantly reduces long-term risk and improves development efficiency.
One of the most searched questions in this space is cost. Let’s address it directly. The real question is not the cost of prototyping, it’s the cost of getting the product wrong.
1. Wireframe-only engagement: $3,000 – $8,000
Suitable for early internal alignment and basic investor conversations. No user research. No interactive testing.
2. Clickable Prototype (Mid-Fidelity): $8,000 – $20,000
This cost includes UX design, interactive flows, and basic usability review. Appropriate for seed-stage fundraising and initial user testing.
3. High-Fidelity Prototype + User Research: $20,000 – $45,000
This cost includes full UI/UX design, interactive prototype, user testing panel, and findings report. It is the standard for Series A fundraising, enterprise product launches, and products where user experience is a core differentiator.
4. Product Discovery + Prototype + MVP Build: $45,000 – $150,000+
This cost includes full-service engagement from zero to market-ready product. Includes all prototyping phases plus full software development.
The ROI framing that matters
If your product launch fails due to a UX problem that would have been caught in a $25,000 prototyping engagement, the cost of that failure in wasted development, delayed revenue, and lost market opportunity is typically 5–15x the prototyping investment. The math is not subtle.
The Hidden Cost of Skipping Prototyping
Let’s be direct about what happens when teams skip this step:
Scenario A
A HealthTech startup builds a patient-facing telemedicine app for 9 months. Launch day. Users find the appointment booking flow confusing. Abandonment rate: 78%. They spend another 4 months rebuilding the onboarding experience.
Total wasted cost: ~$340,000.
Scenario B
The same startup spends 3 weeks on a high-fidelity prototype. User testing reveals the booking confusion early. They redesigned the flow in 4 days. Development builds it right the first time. Launch day abandonment: 22%.
Total savings: hundreds of thousands of dollars and months of time.
Scenario C
A SaaS startup builds a project management tool with multiple advanced features over 6 months. After launch, they discover users only use 30% of the features, while the core workflow feels complicated and unintuitive. Adoption stalls, churn increases, and the team is forced to simplify the product post-launch.
Impact: 3–5 months of rework, delayed growth, and significant opportunity loss in a competitive market.
Where the Cost Actually Comes From
In many cases, companies are forced to invest heavily in product optimization services after launch to fix issues that could have been avoided earlier.
Skipping prototyping doesn’t just waste development time; it multiplies costs across every stage:
- Engineering rework: Rebuilding features after development is significantly more expensive than fixing them during design
- Delayed time-to-market: Every iteration post-launch pushes back growth, revenue, and market positioning
- Lost users and revenue: Poor user experience leads to drop-offs that are hard to recover
- Opportunity cost: While you fix mistakes, competitors move faster and capture market share
- Team inefficiency: Misalignment between design, product, and engineering leads to wasted effort
What the Data Clearly Shows
This isn’t opinion, it’s backed by consistent industry data:
- Products built with extensive user research and testing are twice as likely to exceed their business goals (Forrester Research)
- Companies that prioritize UX design see a 200–400% ROI on UX investment (IBM)
- The average cost of fixing a software defect increases 15x from design to post-release (NIST)
The numbers tell the same story from every angle: prototype, validate, then build.
How to Execute Rapid Prototyping in 2026 (and Why RipenApps Is Your Best Bet)
You have understood the concept of rapid prototyping. You’ve evaluated the approaches. Now it’s time to make the decision that actually moves your product forward. This section gives you the execution framework, the decision criteria for selecting a development partner, and the real-world proof that this works.
How to Evaluate a Rapid Prototyping Partner: 7 Non-Negotiable Questions
Before you sign any engagement, ask these:
- Do they start with user research or jump straight to screens?
A partner that starts with Figma before understanding your user is selling you a design service, not a product development service. These are not the same thing.
- Can they show you real case studies with measurable outcomes?
Not just “here are some screens we made.” Real metrics: usability improvement rates, effective time-to-market reductions, post-launch performance data.
- Do they involve engineers during the prototyping phase?
If design and development are siloed, you’ll build something that looks great but can’t be built efficiently. The best partners involve engineering leads in prototype reviews to catch technical constraints early.
- What does their user testing process look like?
If they can’t answer this with a specific number of test users, testing protocols, and how they synthesize findings, they’re not doing real UX research.
- How do they handle iteration?
Rapid prototyping means multiple cycles of feedback and refinement. Understand how many revision rounds are included and what the change management process looks like.
- What’s their handoff deliverable?
The prototype isn’t the final product; it’s the blueprint. Make sure the handoff includes design systems, annotated specs, and developer-ready assets, not just a PDF of screens.
- Do they have domain experience in your industry?
A partner who has built HealthTech products understands HIPAA constraints, patient psychology, and clinical workflow integration. A generalist doesn’t. Domain experience directly reduces risk.
Decision Framework: Are You Ready to Prototype?
Use this checklist. If you can check 5 or more of these, you’re ready to engage a prototyping partner now:
- You have a defined problem your product solves
- You can describe your target user with specificity
- You have a budget allocated for pre-development product work
- You have a timeline investor deadline, launch date, or market window
- You understand that building without validation is a gamble you can’t afford
- You’ve seen competitors move faster and want to close the gap
- You need to present a product to investors, a board, or enterprise clients
- You’ve experienced the cost of building the wrong thing before and won’t repeat it
If you checked 5+, the next step is a conversation, not more research.
What Rapid Prototyping Looks Like When Done Right: The Full Picture
Let’s consolidate the complete picture of what best-in-class rapid prototyping produces in 2026:
- A validated user understanding: not guesses about who your user is and what they need, but data from real interviews and observation.
- A tested information architecture: navigation and content structure that users can understand without instruction.
- Interaction flows with zero critical usability: failures tested, iterated, and proven before development begins.
- A high-fidelity prototype: one you can show investors, clients, or partners with confidence.
- A design system and component library: that your development team uses as the build foundation.
- Developer-ready annotations and specs: eliminating the #1 cause of development rework: ambiguous design intent.
- A documented research foundation: user insights, testing findings, and design rationale that inform every product decision going forward.
This is what you get when prototyping is done as a strategic product discipline, not a design task.
The RipenApps Validation-First Product Framework
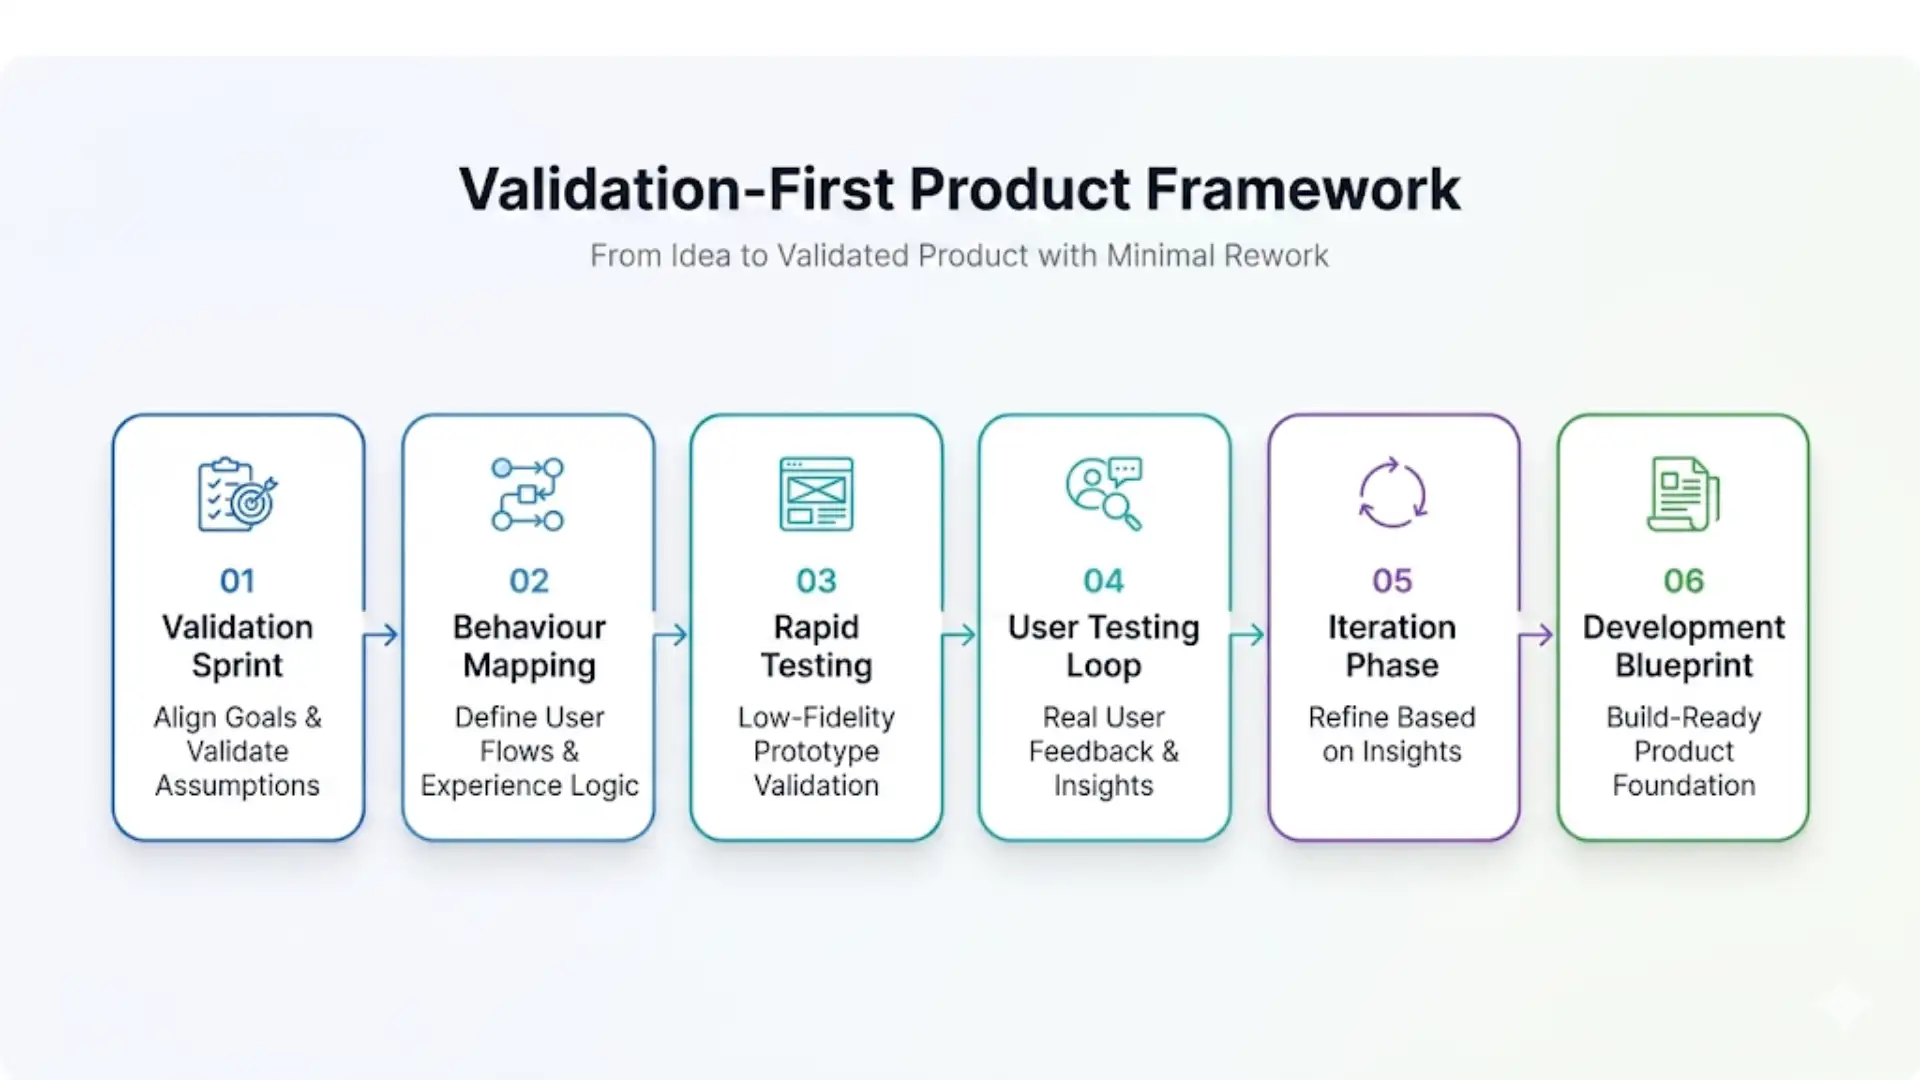
Most companies treat prototyping as a design step. We treat it as a risk elimination system.
This is not a generic framework. It’s a structured way to move from an idea to a validated product with minimal rework and maximum clarity.
After delivering prototyping and development engagements across 250+ projects, we’ve refined a prototyping and digital product development process that consistently reduces development rework by over 60% and accelerates time-to-market by 40–55%.
Here’s exactly how we do it:
Phase 1: Validation Sprint (Eliminate Assumption Risk)
Timeline: Week 1–2
Everything starts with clarity, not screens. If you skip this phase, you are not building a product; you are scaling assumptions.
Our product team conducts:
- Stakeholder workshops to align on business objectives, user personas, and success metrics
- Competitive landscape analysis not generic, but specific to your category and positioning
- User research interviews with real target users to surface unspoken needs, frustrations, and mental models
- Technical feasibility review, our engineering leads evaluate platform decisions, integration requirements, and mobile app architecture implications before a single frame is drawn
Output: A Product Discovery Report that serves as the foundation for everything that follows. No guesswork. No assumptions. Just validated direction.
Phase 2: Behavior Mapping (Design How Users Actually Think)
Timeline: Week 2–3
Before a single screen is designed, we map how users actually behave.
Most products fail not because of bad UI, but because of broken flows.
This phase defines:
- Core user flows for all primary use cases
- Navigation architecture
- Content hierarchy
- Interaction logic
- Edge cases and error states
This phase prevents the most common prototype failure mode: building beautiful screens that connect into a confusing, broken flow.
Phase 3: Rapid Assumption Testing (Low-Fidelity Prototype)
Timeline: Week 3–4
Now we move fast, without over-investing.
If you jump to high-fidelity too early, you’re increasing rework risk. At this stage:
- Structural layout is defined
- Navigation patterns are established
- Content placement is validated
- Initial usability testing begins internally
Phase 4: Reality Check (User Testing Loop)
Timeline: Week 4–6
This is where most assumptions break.
And that’s exactly the point. The prototype is interactive and ready for user testing panels. At RipenApps, we:
- Run moderated usability tests with 6–10 users from your target segment
- Capture quantitative data (task completion rates, time-on-task, error rates)
- Synthesize qualitative insights from user observations
- Produce a usability findings report with prioritized recommendations
If users struggle here, fixing it now prevents expensive rebuilds later.
This is where validation actually happens.
Phase 5: Insight-Driven Iteration (Refine What Matters)
Timeline: Week 6–8
Based on testing insights, we refine:
- Problematic flows
- Confusing UI patterns
- Missing functionality identified by users
- Visual hierarchy and readability issues
The output is a final, investor-ready, development-ready prototype with complete annotations, component libraries, and interaction specs.
Phase 6: Build-Ready Product Blueprint (Development Handoff or Execution)
At this point, you’re not guessing anymore. You’re building from validated insight.
If your team is building:
- Complete Figma files
- Component libraries and design systems
- Developer-ready annotations and specs
- Clearly defined flows and edge cases
If we’re building:
- Our engineering team works from the same validated blueprint
- What gets built matches what was tested
- No interpretation gaps, no rework cycles
This is where most development inefficiencies disappear.
RipenApps Case Study #1: HealthTech Patient Engagement Platform
Client: A Series A-stage US-based digital health company building a chronic disease management platform.
Challenge: The client had spent 4 months and a significant budget on a development-first approach. User testing of the half-built product revealed fundamental navigation problems and a confusing onboarding experience. They needed a reset.
RipenApps Approach:
- 2-week discovery sprint with patient interviews (15 users with chronic conditions)
- Complete flow redesign based on research insights
- High-fidelity prototype built and tested in 4 weeks
- 3 rounds of usability testing before development began
Result:
- Onboarding completion rate improved from 31% (tested on the previous version) to 84% on the prototype
- Development phase completed 38% faster due to the elimination of ambiguity
- Product launched on schedule and hit 10,000 active users within 90 days of launch
Key Insight: Patients with chronic conditions wanted simplicity and reassurance, not feature richness. The original design was feature-heavy and medically dense. The research-led prototype stripped it back to what users actually needed to complete their core health tasks. The product succeeded because it was built from validated user understanding, g not internal assumptions.
RipenApps Case Study #2: FinTech Lending Platform for SMEs
Client: A FinTech startup targeting small and medium enterprises in Southeast Asia with a digital lending product.
Challenge: The founding team had strong financial services domain expertise but no design or product experience. They needed to go from concept to fundable prototype in 6 weeks to meet an investor deadline.
RipenApps Approach:
- Rapid 5-day product discovery phase
- Competitor teardown of 8 leading FinTech lending products
- Complete UX flow designed around SME borrower psychology and trust signals
- High-fidelity clickable prototype built in 3 weeks
- Pitch narrative aligned to prototype flow
Result:
- Prototype delivered in 5.5 weeks (half a week ahead of deadline)
- Client successfully closed a seed round of $2.1M within 8 weeks of prototype delivery
- Investors cited “product clarity and UX maturity” as key confidence signals
Key Insight: In FinTech, trust is a UX problem before it’s a technology problem. Our research revealed that SME borrowers abandoned lending applications primarily due to opaque fee structures and unclear eligibility criteria, not interest rates. The prototype made both completely transparent at every step. That decision alone changed the product’s conversion dynamic.
Final Words
If you’ve read this far, you already know more about rapid prototyping than 90% of the founders and product managers who will launch products in 2026 and fail for entirely preventable reasons. The question isn’t whether rapid prototyping is valuable. The data, the case studies, and the logic all point in one direction. The question is: who is going to do it right for your product?
At RipenApps, we’ve built a practice around one simple belief: the best products in the world are built from the deepest user understanding. Not from the biggest budgets. Not from the most senior engineers. From knowing, really knowing what your user needs, and designing every interaction around that truth.
If you’re looking to reduce risk and accelerate your product journey, investing in top rapid prototyping services can make all the difference. If you’re building a digital product in 2026 and you’re serious about getting it right the first time, the next step is simple.
FAQs
1. How long does rapid prototyping take?
Depending on complexity and fidelity level, rapid prototyping engagements at RipenApps typically run 3–8 weeks. A clickable prototype for a single-platform app with 15–20 key screens can be ready for user testing within 3–4 weeks. Complex multi-platform products with extensive user research may take 6–8 weeks.
2. Do I need a prototype before I start development?
If your budget for development is above $30,000, the answer is almost always yes. The cost of a prototype is consistently lower than the cost of rebuilding features that weren’t validated before development. For products with smaller development budgets, at a minimum, a clickable wireframe prototype is strongly recommended.
3. What’s the difference between a prototype and an MVP?
A prototype is a testable representation of your product; it may or may not be functional code. An MVP (Minimum Viable Product) is a fully functional product with a limited feature set, intended for real users in a real market. Prototyping comes before MVP development. A validated prototype significantly reduces the risk and rework in the MVP build.
4. Can RipenApps build both the prototype and the final product?
Yes. Many clients engage us for a full-cycle product development engagement that begins with prototyping and flows seamlessly into development. This integrated model eliminates the handoff risk between separate design and development agencies.
5. How much does it cost to hire a rapid prototyping company?
Costs vary by scope, fidelity, and research depth. Wireframe-only engagements start around $3,000–$8,000. High-fidelity prototype packages with user research typically range from $20,000–$45,000. Contact us for a scoped estimate specific to your product.
6. What industries does RipenApps have prototyping experience in?
We’ve delivered prototyping and product development engagements across HealthTech, FinTech, EdTech, Logistics & Supply Chain, Real Estate Tech, and Enterprise SaaS. Domain experience in your industry means we understand the regulatory constraints, user psychology, and competitive benchmarks before the first workshop.

SHARE
WRITTEN BY
Ishan Gupta
CEO & Founder
Ishan Gupta is a seasoned entrepreneur and CEO with extensive 8+ years of experience in business and mobile app development landscape. He believes that the right digital product allows companies to focus on what they do best, while technology handles the rest. With deep exposure to global markets, he understands what makes an app succeed. His approach translates business needs into clear product strategies, ensuring that every feature contributes to measurable ROI.
View All Articles

 India
India USA
USA Australia
 Canada
 UK
UK UAE
UAE